Drywall Installation Tips

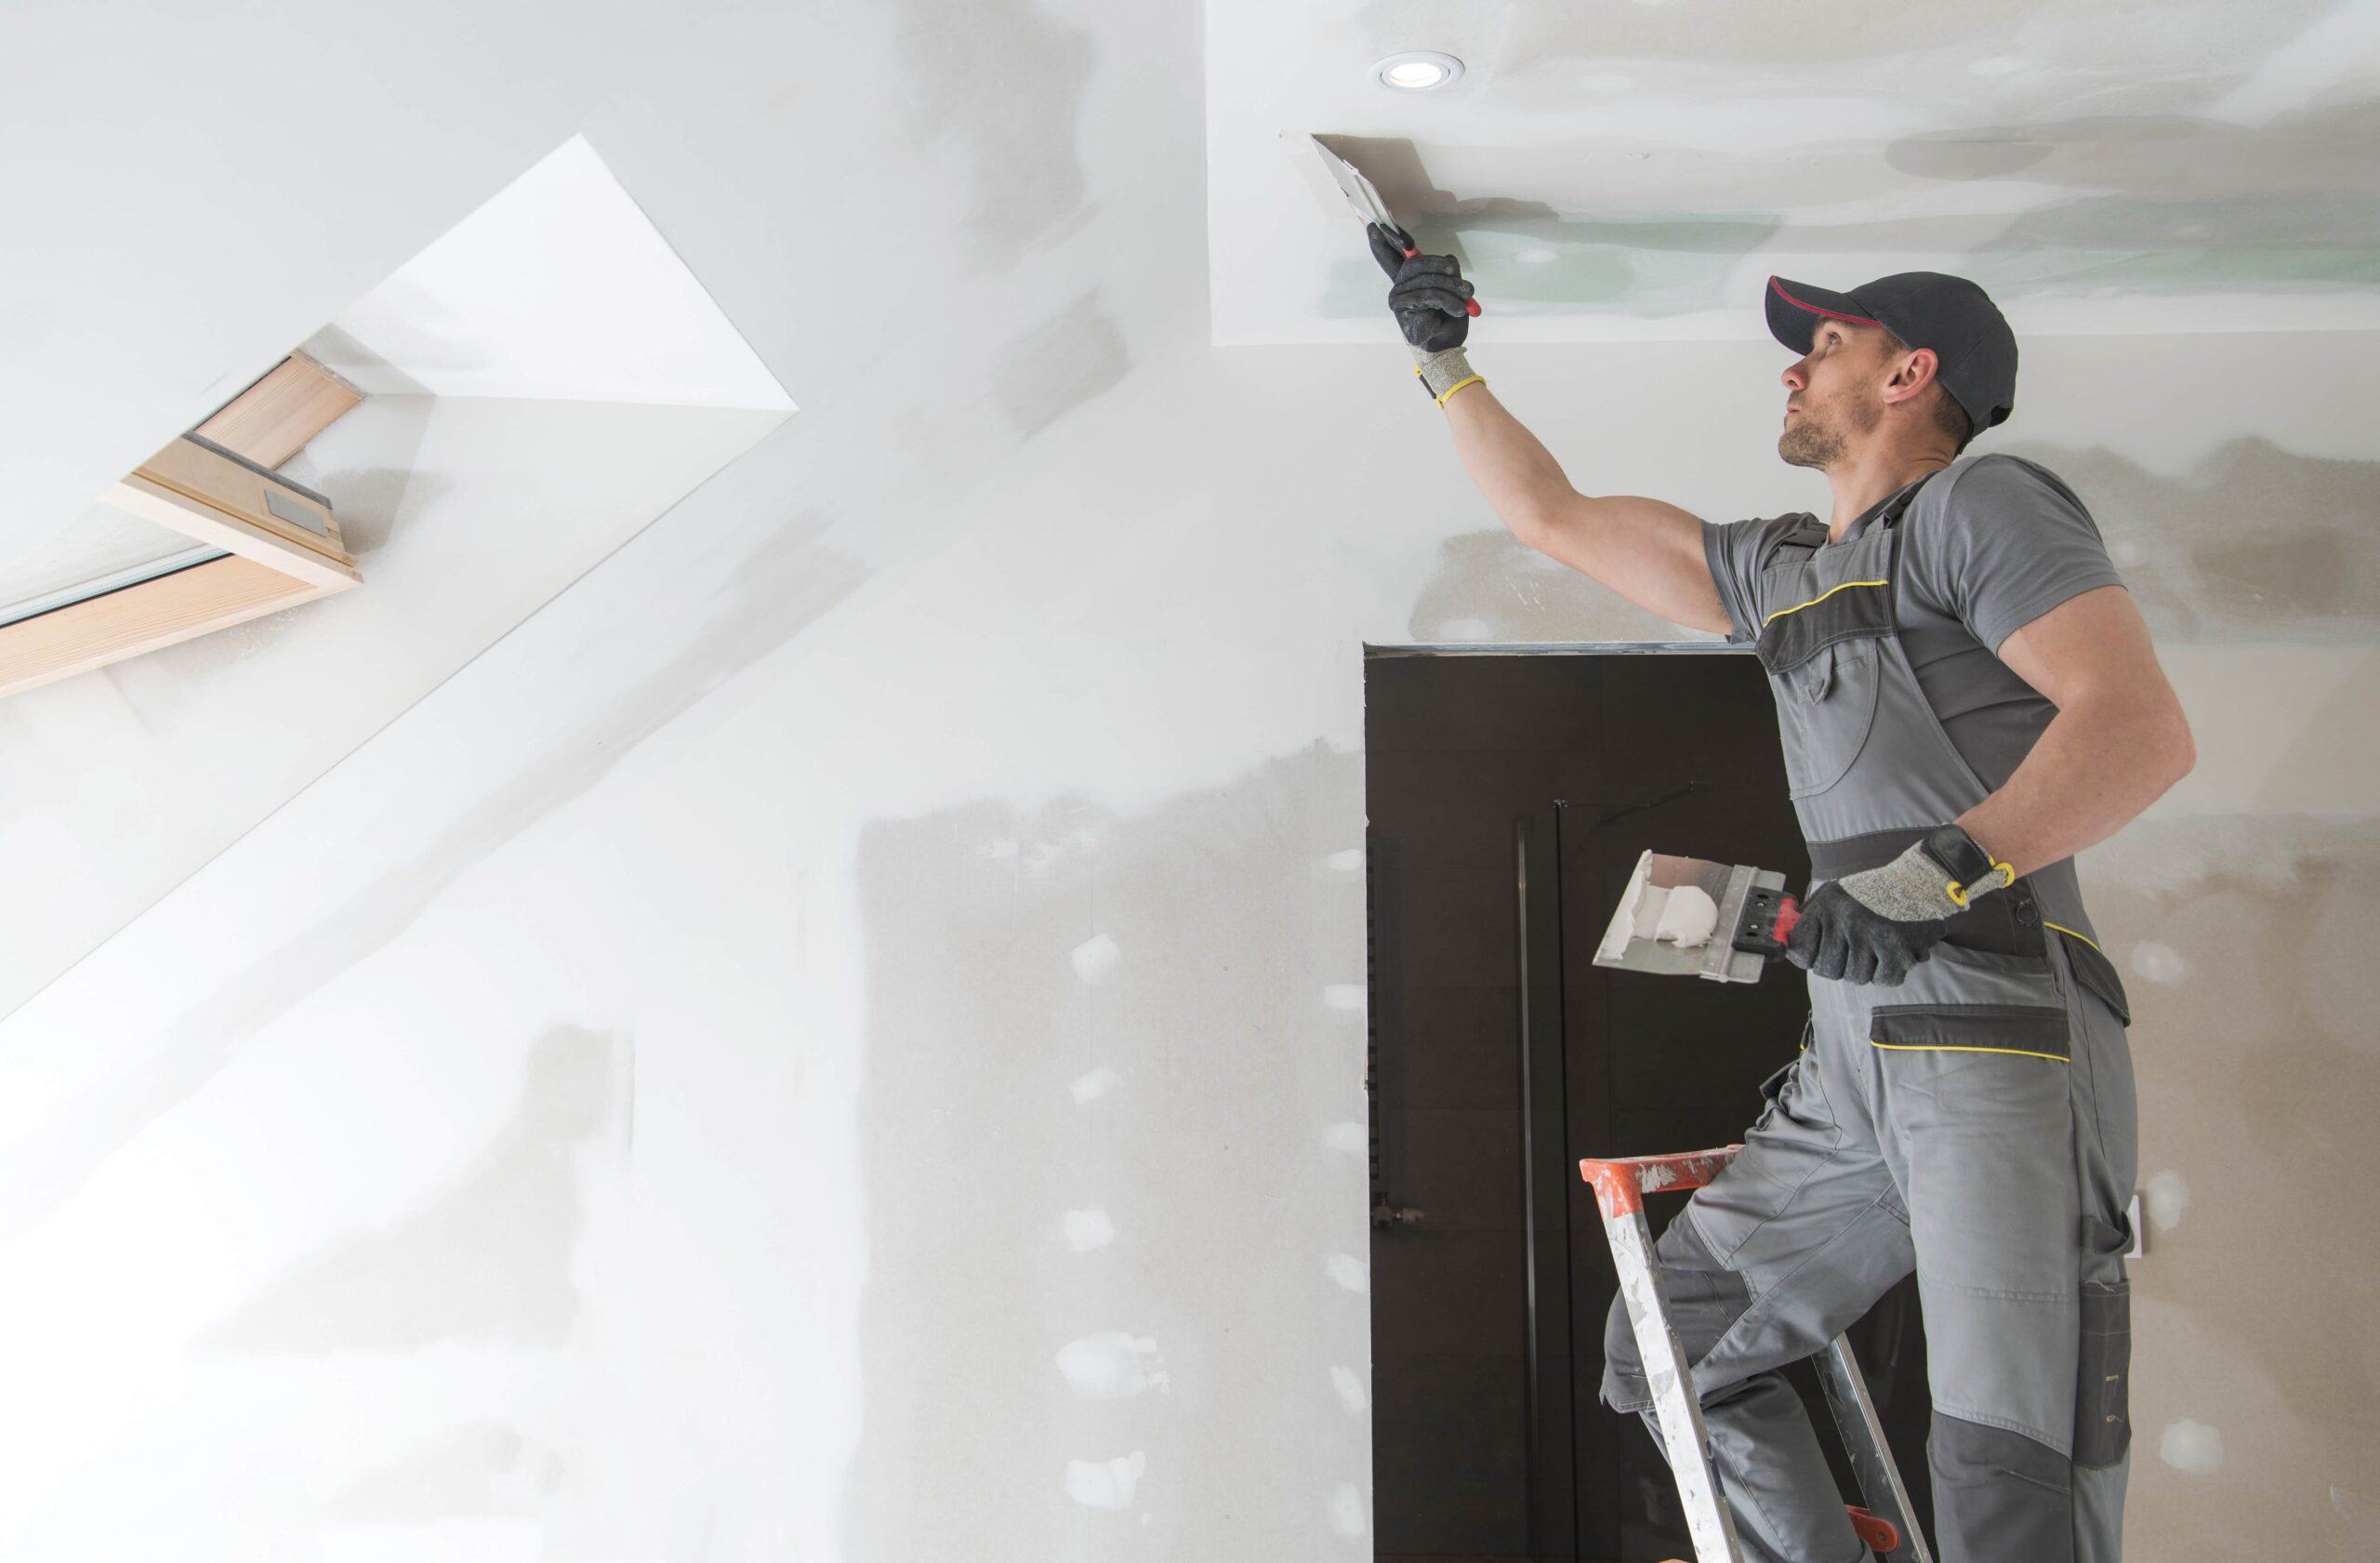
Local Painting Contractors Las Vegas are ideal material for walls and ceilings because it’s easy to work with and relatively inexpensive. It’s also a very DIY-friendly material, as long as you follow a few tips from the pros to ensure the job is done correctly.

Start by mixing your mud into a smooth, peanut butter-like texture. Apply a thin finishing coat to all edges and corners of the wall.

Adding on to a room or completing a home remodel can require new walls, and installing drywall can be a DIY project that saves you the cost of hiring a contractor. To make sure your drywall installation looks as good as possible, follow some tips that will help you hang the wallboard like a pro.

Before hanging drywall sheets, it’s important to level and straighten the framing. Uneven framing can result in sagging and bulging drywall panels, which will add to the cost of the job and create uneven surfaces in your finished rooms. Using a power or hand saw, carefully cut away the excess wood at joists and beams to make the area flat.

When cutting drywall for openings such as outlets, light fixtures, and doors, it’s a good idea to use a spiral saw. These tools have a thin, rotating bit that makes it easy to cut around corners and other shapes. If you’re going to be installing a large number of these types of holes, it might be worth investing in a special tool that cuts a perfect circle every time.

Always measure the length and width of a drywall sheet before cutting it to ensure you get the most accurate measurement and fit. If you need to become more experienced with a circular saw, ask an expert for some tips before trying it yourself.

It’s also a good idea to pre-nail each drywall sheet before you hang it, using a hammer and nails to set the screws into place. It will help prevent the sheets from shifting once turned and minimize the risk of nails breaking through the paper face. It’s a common mistake to skip this step, but it can be very easy to miss rogue fasteners when you’re spackling.

Once all the drywall is installed, check over it for protruding screw heads that need to be set. It’s important to put these slightly below the surface of the drywall so you don’t damage it when you paint or hang decorations later on.

The hanging of drywall panels is the first step in the mudding and taping. The process is not difficult, but it does take some practice to manage the panels and secure them properly. It is best to have a friend or a professional if you work alone. It is also very important to follow the adage “Measure twice, cut once.” This will ensure you are installing the correct size of drywall and will prevent errors.

Before starting, make sure the studs and framing are in good shape. If not, you may need to install a new brace or use a different fastener to ensure your walls are strong and stable. It is also important to note that you should stagger the joints. This will give your walls more strength and help avoid cracks down the road.

After marking the wall or ceiling for the electrical and plumbing, you can begin hanging drywall sheets. To do this, position the sheet against the ceiling or wall and mark a line using a drywall square and a utility knife. Once you have the markings made, carefully snap the sheet against the marks.

It is a good idea to pre-drill holes in the joists where you will be placing your drywall boards, as this will save time and effort. Once your drywall is in place, secure it to the joists with a hammer and ring-shank nails. Typically, you should use five screws per board and space them evenly across the board.

It would be best to cover any outside corners with a metal corner bead. These are available at most home improvement stores and are easy to install. Cut the bead to the height of your wall, leaving about a half-inch of wiggle room, and tack it in place with nails. Be sure to drive the screws slightly below the surface of the drywall, as this will protect it from damage and allow the gypsum core to expand or contract without tearing the paper.

As you finish each section of the wall, remember to sit the butt end of the drywall against a stud or other framed structure to keep it from sagging over time. This will also keep your drywall from being warped by the movement of the house or its contents. Once the drywall is in place, you must sand down any rough areas.

Drywall is an excellent material for walls and ceilings, and it is commonly used in residential homes, schools, hospitals, and many other types of buildings. It is fire resistant, sound absorbent, and an insulator. Professional installers use various tools and techniques to hang and finish drywall properly. It’s important to understand that several steps are involved in a drywall installation project. If any of these need to be included, it can impact the finished appearance of the building.

The first step is to inspect the drywall. This includes looking for any protruding screws and nail holes. If a screw is driven through the drywall paper and punctures it, its holding power decreases and could lead to a future problem. Also, look for any rips or tears in the drywall surface. If you find any issues, repair them immediately to avoid future problems.

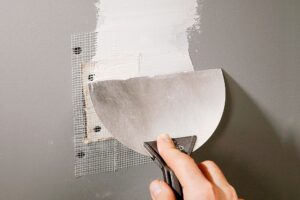
Next, you must pre-fill any gaps or ridges in the drywall with a thin coat of mud (also known as joint compound). This will help ensure that all seams, creases, and uneven surfaces are smooth and covered with a consistent, clean appearance. It is important to fill these areas appropriately as it can result in a lumpy appearance when dried.

Using a drywall roller, apply a light coat of compound to the entire wallboard. It’s best to work in sections as the compound can dry quickly.

After the mud has dried, you can sand it to achieve a smooth surface. Sanding can take a while and requires the proper equipment to do so effectively. It’s a good idea to purchase a specialized sanding tool, as these often offer better values, bulk discounts, and more knowledge about specific products than big-box home improvement stores.

Once the sanding process is complete, you can prime and paint the drywall as desired. Some contractors may leave the drywall bare and unpainted, but most will cover it with a level 3 finish. This allows the contractors to save time and effort by not having to sand the surface before painting.

The completion of drywall construction marks the point at which a home or business stops looking like a construction site and begins to look like a livable and functional space. In addition to transforming the interior of a structure, drywall also provides a sound-suppressing and thermal layer. Drywall installation is a standard part of building construction, and it is easy for most people with basic construction skills to perform. Also called sheetrock, wallboard, or gypsum board, it is available in thicknesses ranging from 1/4″ to 5/8.”

Before beginning a drywall project, homeowners should review local building codes and requirements. Also, it is wise to invest in PPE (Personal Protective Equipment) that includes a dust mask, work gloves, and safety glasses. A t-square, a hand tool that helps ensure straight cuts, and a rasp, which smooths ragged drywall edges, are useful as well.

A good drywall installer will always take the process. Instead, they carefully inspect the framing for warped boards and bowed joists. Even minor irregularities in framing are easily camouflaged by drywall, but serious misalignment can cause unsightly humps and hollows in the finished surface. If a drywall contractor suspects a serious problem, they may suggest using a jig to support and straighten the joist.

Once a homeowner has determined which area of the room will require new drywall, it is important to measure and diagram the layout so that the dimensions are clearly understood. This will help determine the amount of necessary drywall and where the cuts should be made. For example, if an electrical box is located in the center of a ceiling panel, it is important to know how close the box can be placed to a stud, as this will impact wire access and future maintenance.

If there is a possibility of asbestos in the existing drywall, it should be tested before it is removed and replaced with new drywall. Some older homes have asbestos insulation, and professional remediation costs $250 to $850 per room.

Bring Your New Home To Life With These Drywall Tips

Drywall Tips

Drywall is the most common wall covering material in homes. It’s made from gypsum, which is mixed with additives to create a slurry that is sandwiched between two layers of paper and then dried.

You’ll need a couple of drywall knives (a five inch and a ten inch), a utility knife, and some sanding equipment. You may also want to wear a dust mask.

Tape the Joints

Drywall is a relatively cheap material that allows builders to create rooms much faster than with wood framing. It also offers a smooth surface that’s easy to paint and is perfect for concealing wiring, plumbing or other unsightly elements in a room. Properly taping drywall is a fine art that takes practice to master, but it’s well worth the effort when you want your finished wall to look as flawless as possible.

The first step is to apply a thin layer of drywall joint compound (also called “mud”) over the tape and nails. This mud is a mixture of limestone, emulsifiers, various polymers and water that’s used to cover the joints and nail holes in drywall before it can be sanded to a smooth finish. It typically takes a day or so to dry, but fast-setting mixes are available that take just a few hours to harden.

Use a quality knife, such as Hyde Tools’ 6-Inch Flexible Black & Silver Stainless Steel Joint Knife to apply the mud over each joint. A good knife will distribute the mud evenly and provide you with a smooth, consistent finish. After applying mud to the entire length of a single vertical joint, position a strip of paper tape about two inches shorter than the joint over it. Pull the joint knife smoothly to bed the tape securely in the mud and make sure that it is fully covered. Repeat this process with all vertical joints in the wall.

Next, you will need to spread a thin second coat of mud over the tape and nails. This is important, because it will protect the tape from damage and ensure that any future drywall coatings will adhere to it. Make sure to spread enough mud to completely fill the corner bead pockets; otherwise, air and structural settling may cause these pockets to shrink or depress over time.

Fill the Gaps

When it comes to drywall, the skill required goes beyond brute strength. Finishing a new home or remodeling an existing home with drywall takes finesse and patience. It also requires a few tools like a small and large drywall knife, swivel-head pole sander and premixed joint compound (or “drywall mud”).

Before you start to tape and mud your drywall, be sure that the gap between your floor and wall is not caused by water leaks in your plumbing lines. If it is, you should hire a professional building inspector to inspect the gap and identify its source. It could be a sign of a serious foundation problem and should be corrected as soon as possible to prevent major damage to your home structure.

A few tips to help you make the mud job as smooth as possible:

If the first board doesn’t fit perfectly against the ceiling or wall, trim it to ensure that it fits tightly. However, don’t push the boards together too tightly. Forcing them too closely can cause them to break and crumble.

Use a level to measure where the next piece will be cut. You can either make all your cuts before beginning the project to save time and money, or you can cut each board as you work. The latter method results in less waste, but can take more time.

When constructing your outside corners, be sure to use a special drywall corner bead. This bead creates an outer edge on the corners of your drywall that makes it look more professional and attractive. It can be purchased at most home improvement stores, but it is usually much cheaper if bought online.

Apply the First Coat

Getting the drywall ready for painting or wallpaper requires a little finesse. You’ll need a few tools, including a small and large drywall knife, a swivel head pole sander, and premixed joint compound (or “mud”). The mud is mixed with water and you can add more or less to adjust the consistency.

First, apply a thin coat of mud to the entire wall. Roll the mud onto the surface with a roller, using down and side strokes to create an even coat. Keep in mind, it won’t be perfectly smooth at this point but the first coat should cover any raised surfaces and fill in the seams.

After the first coat, use your drywall knife to cut away the excess. Be careful to avoid cutting into the tape.

Next, apply a second coat. This time, you can apply the mud over the tape but not into the tape. For this coat, apply a thicker layer and be sure to get around all screw heads.

If you’re working on a long stretch of wall, you may want to consider using a bucket and trowel. It saves time and effort but you’ll need to be more careful to not overdo the mud.

It’s best to minimize the number of “butt” joints in your drywall. Long, tapered edges will meet more easily and make a better seal. If you have to have butt joints, apply a thin, generous layer of joint compound to both sides and then press the paper tape over it. This will help the mud adhere to the tape and create a good seam. Be sure to cover all of the tape on the inside and outside corners.

Apply the Second Coat of Mud

As the first coat dries, apply another very thin coat of mud over it. You’ll want to be sure your knife is still wiped clean of excess mud. It’s important that the second coat of mud go right over the tape, not just the wall. This will help keep the tape stuck and allow you to hide any humps under it with the final, very thin layer of mud that comes last.

On inside corners, fold a strip of pre-creased paper tape into place and smooth it in the mud with your 6-inch taping knife or an inside corner taping tool that features a preformed 90-degree shape for easy bedding. Make sure to use light stroking movements so you don’t dislodge the tape. It’s not unusual for the mud swath on butt joints to be 2 feet wide or wider, so don’t worry about it being too thick, just do your best.

You should also repeat the process with the 10-inch knife on screw indentations, beveled joints, and inside and outside corners. Once the mud dries, knock down any ridges with 100-120 grit sandpaper and lightly sand again. This will prepare the surface for painting and will ensure your drywall looks seamless.

Note that it takes a long time for drywall mud to dry, so be patient! The mud will look gray or splotchy when it’s wet, but will be white once it’s completely dry. Be sure to use fans and keep the area warm and dry so it can finish drying. It may take 24 hours or more, depending on geography and humidity. Using a fan to blow air across the surface can speed up the process, but be careful not to force it.

Apply the Final Coat of Mud

Once the first coat of mud is completely dry, apply a final thin layer, called the skim coat, to smooth out the drywall surfaces and fill any remaining gaps. Ideally, the surface should be nearly invisible to the eye. This final coat will prepare the walls for paint or a textured finish.

When applying the skim coat, be sure to keep it away from the seams. This will help prevent future cracking. Also, be careful not to get the mud too wet. If the mud is too wet, it will take longer to dry and can create unsightly rock-like ridges that are difficult to sand.

To speed up the drying process, use a fan to move air around the room. Avoid using extra heat, however, as it can cause the mud to set too quickly and result in cracked areas down the line.

It’s important to note that not all drywall mud is the same. There are different types of mud available for specific applications, such as all-purpose compound for taping and bedding, topping compound for the final skim coat, and spackling for small patching or repairing divots or holes.

For example, spackling is denser and harder when dry than all-purpose drywall compound, which is why it’s perfect for smaller patching jobs. The same goes for the sanding process: Some types of sanding compounds harden into rock-like ridges that are difficult and time consuming to smooth out, while others easily sand to a smooth finish. Choose an easy-to-sand setting mud to save time and effort in the long run. Topping and finishing mud are also available, which are slightly softer and designed to be more durable than tape-and-bed compound.

Navigation